Preparing the Support Rails for Installation
When installing a system in a cabinet, you need to prepare the support rails for installation after you have numbered the vertical rails.
To prepare the support rails
-
Unpack the components and place them on a stable work surface. Attached to the rails are alignment/support screws for use in cabinet rails with round 13/64 in. (5 mm) holes.
-
If your cabinet rails have round 13/64 in. (5 mm) mounting holes, skip this section and continue to Attaching the Support Rails and Inserting the System.
-
If your cabinet rails have square 3/8 in. (9.525 mm) mounting holes, use the silver alignment screws (located in the package labeled R0897-E0112-01) in place of the screws that are already installed. Go to step 2.
-
-
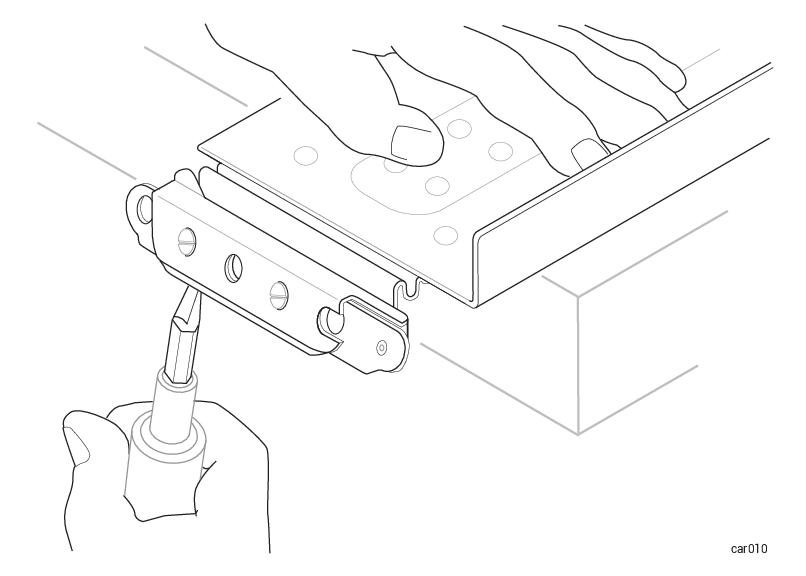
Positioning a flat-head screwdriver in the middle of the front latch, pry open the latch. See Figure 13.
Figure 13: Positioning Screwdriver and Opening Latch
-
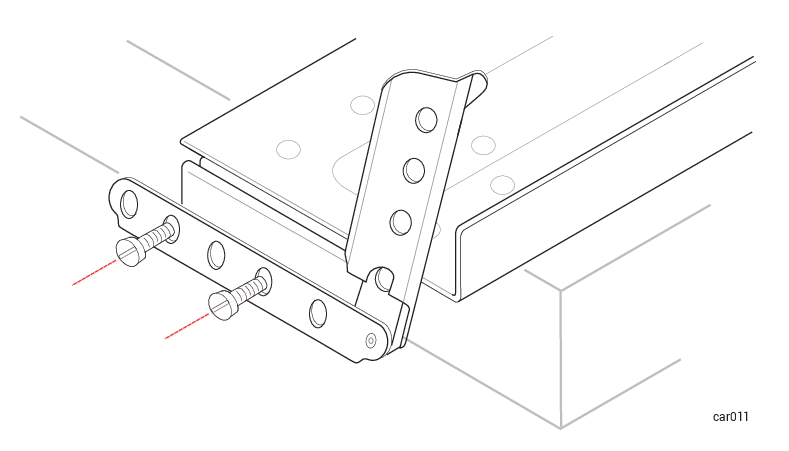
While the latch is in the open position, use a flat-head screwdriver to remove the two existing alignment screws. See Figure 14.
Figure 14: Removing Existing Alignment Screws
-
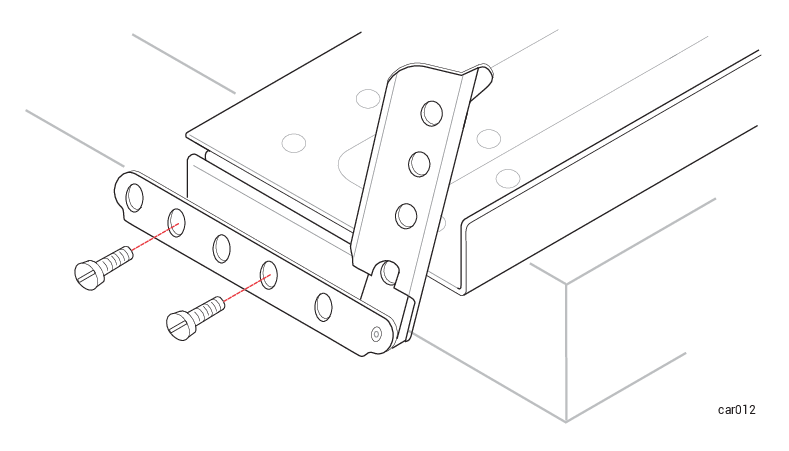
Use a flat-head screwdriver to attach two silver alignment screws in the holes that the previous alignment screws were in. Keep the latch open. See Figure 15.
Figure 15: Attaching Silver Alignment Screws
-
Repeat steps 3-4 for the rear latch.
-
Repeat steps 3-5 for the other support rail.
Next Steps
To continue installing a system in a cabinet, see Attaching the Support Rails and Inserting the System.