Attaching the Support Rails and Inserting the System
After you have prepared the support rails for installation, insert the system onto support rails that are attached to vertical rails in the cabinet. To do so, perform these tasks:
-
Attach the support rails to the vertical rails in the cabinet. See To attach the support rails.
-
Insert the system onto the support rails and slide the system into the cabinet. See To insert the system in a cabinet.
To attach the support rails
-
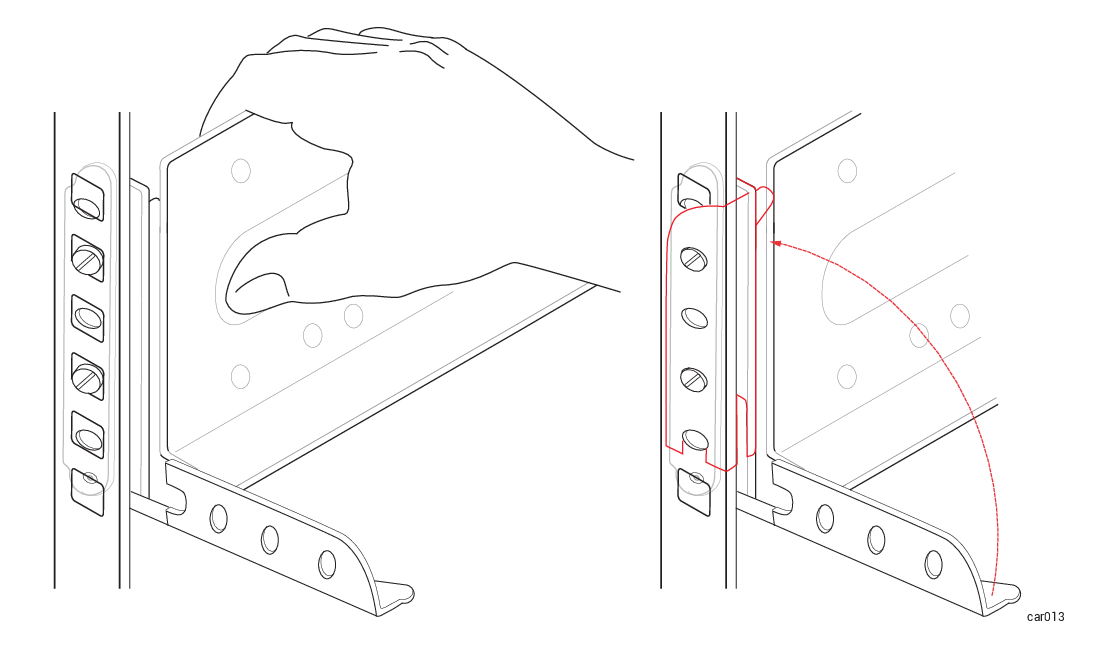
Hold the support rail labeled FRONT LEFT and face the front of the cabinet.
-
Align the silver alignment screws in the front of the left support rail with the 2U holes that you marked in Numbering the Vertical Rails (that is, the third hole of the first U and the second hole of the second U). Close the latch. See Figure 15.
Figure 15: Securing Front of Support Rail
-
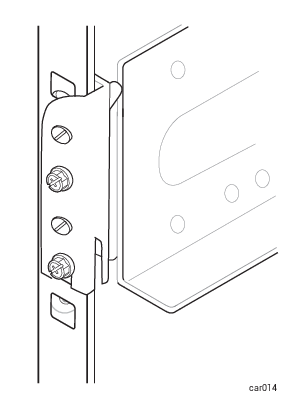
Moving to the rear of the cabinet, align the silver alignment screws in the rear of the left support rail with the 2U holes that you marked in Numbering the Vertical Rails. Adjust the support rail as necessary to fit the depth of the cabinet and close the latch.
-
Secure the rear of the rail by using a Phillips-head screwdriver to attach two black Phillips-head/hex screws in the holes below the silver alignment screws. See Figure 16.
Figure 16: Securing Rear Support Rail
Perform steps 1-4 for the right support rail.
To insert the system in a cabinet
-
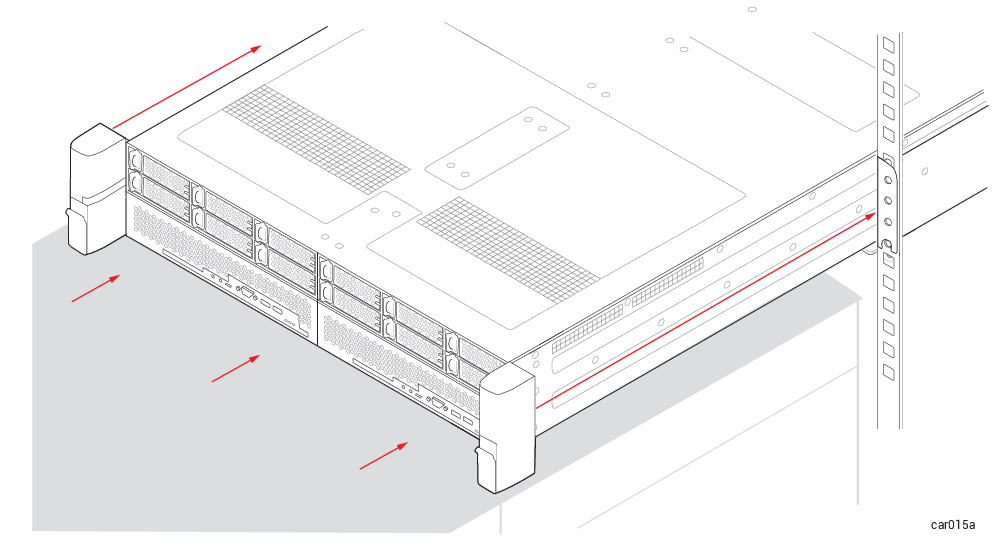
With one person on each side of the system and (ideally) one person in the front of the system, align it in the front cabinet opening and place it on the mounting rails.
-
Slide the system into the cabinet until the left and right ears are flush with the cabinet rails. See Figure 17.
Figure 17: Inserting System into Cabinet
-
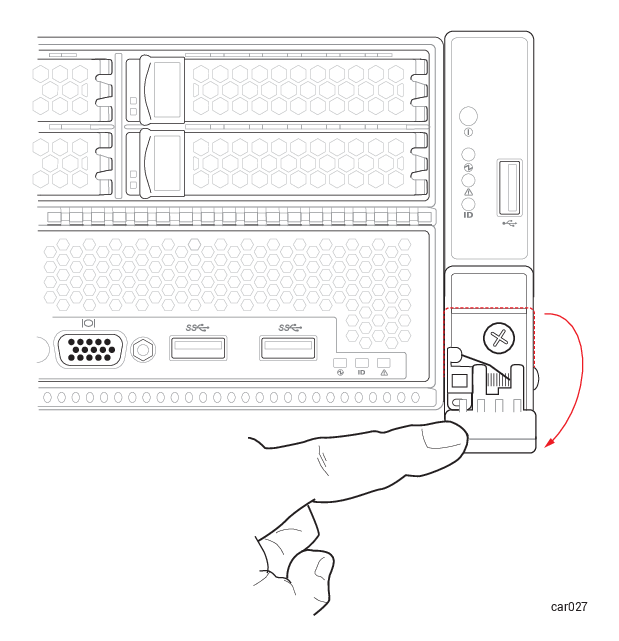
On the right ear, pull down the latch and use the Phillips-head screwdriver to secure the captive screw to the rail. Securing this captive screw fastens the system chassis and the front rail to the vertical rail of the cabinet. See Figure 18.
Figure 18: Attaching Captive Screws
-
Repeat step 3 for the left ear.