Removing and Inserting a Disk Drive
You can remove disk drives from a storage module to replace them or to perform other maintenance procedures. You do not need to power down or remove the storage module to perform this procedure.
To remove a disk drive
-
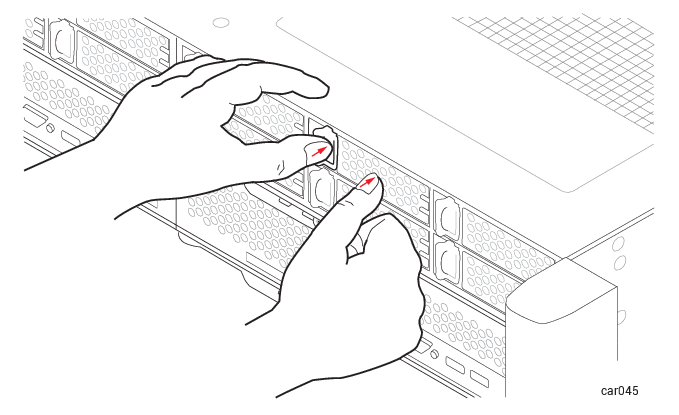
Slide the button on the release lever to the left until the release lever opens. See Figure 34.
Figure 34: Removing Disk Drive
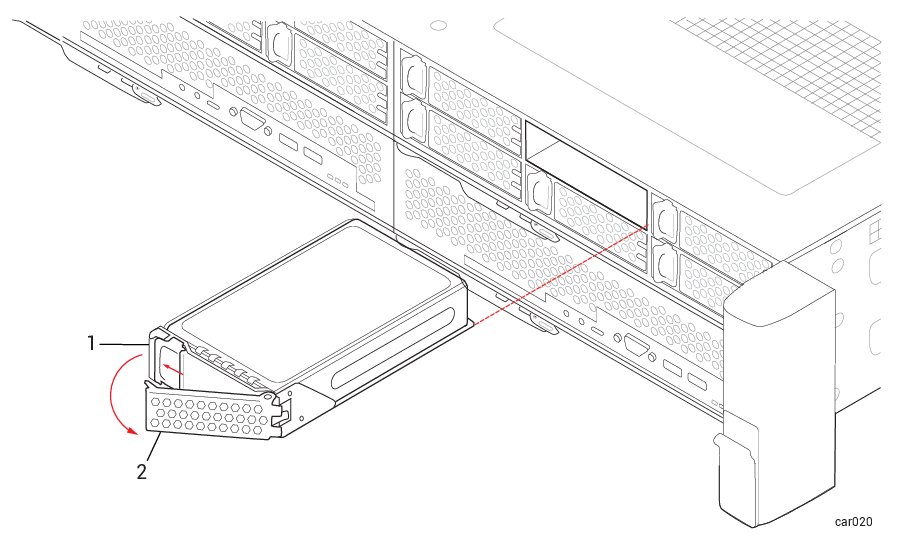
1 Release button 2 Release lever -
Pull the release lever and remove the disk drive.
To insert a disk drive
-
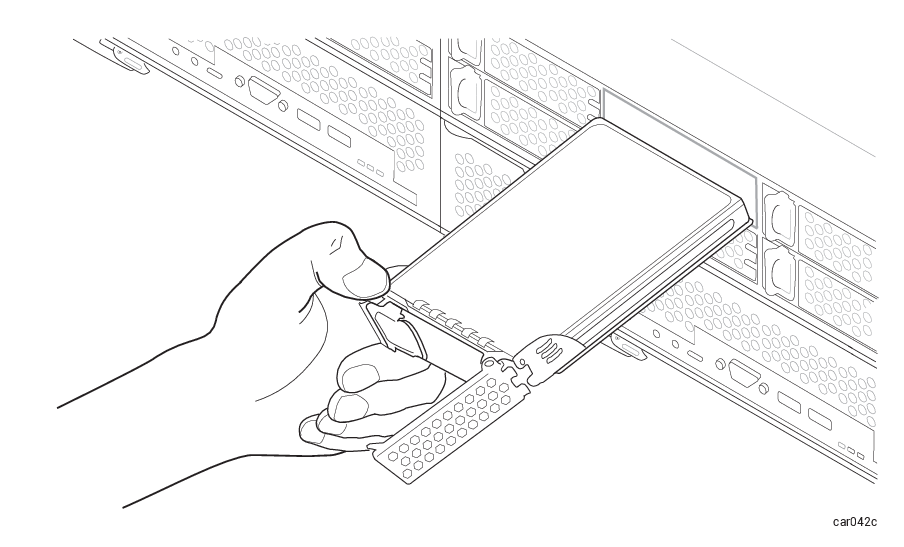
With the release lever in the fully open position, insert the disk drive into the slot at the slight angle shown in Figure 35. Stop when approximately three inches of the disk drive extend from the slot.
Figure 35: Inserting a Disk Drive: Step 1
-
With the release lever still in the fully open position, use your left thumb to apply pressure on the release button while slowly inserting the disk drive into the slot. Stop when the two tabs on the right side of the release lever are flush with the slot opening. See Figure 36.
Figure 36: Inserting a Disk Drive: Step 2
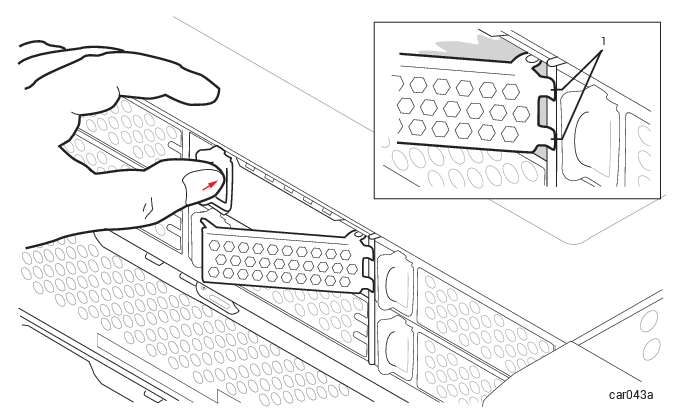
1 Tabs -
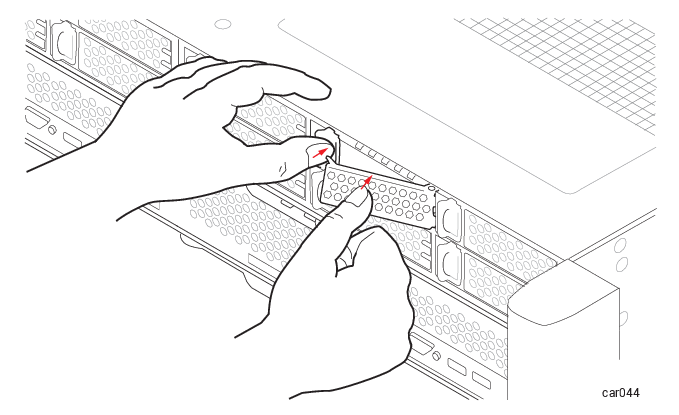
While continuing to apply pressure to the release button with your left thumb, use your right thumb to push the release lever until it locks into place. See Figure 37.
Figure 37: Inserting a Disk Drive: Step 3
-
Push firmly again to make sure that the disk drive is fully seated. See Figure 38.
Figure 38: Inserting a Disk Drive: Step 4
-
If the ztC Endurance system is powered on, check the disk drive's ACT LED. If the LED is solid green, the disk drive is inserted correctly. If the LED is off, the disk drive is not inserted correctly; remove the disk drive and repeat this procedure.