Removing and Replacing an I/O Module
To remove an I/O module
-
Disconnect all cables from the I/O module.
-
Use your index finger to unlatch the release lever on the I/O module.
-
Grasp the release lever and pull it down until it is fully extended and the I/O module extends an inch or two from the system chassis. See Figure 40.
Figure 40: Removing I/O Module
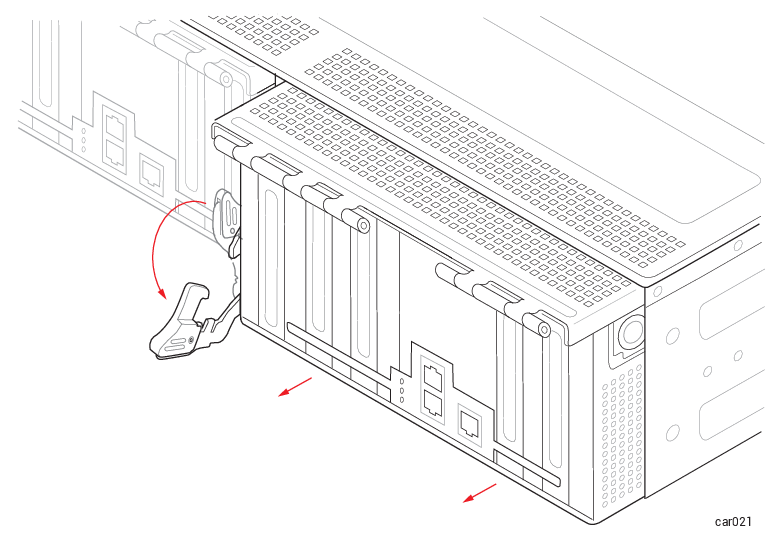 Caution: The release lever must be fully extended as shown in the figure before you perform step 4.Précaution: Le levier de déverrouillage doit être complètement étendu comme indiqué sur la figure avant d'effectuer l'étape 4.
 -
Holding the I/O module on each side, pull it straight out of the system chassis and place it on a flat, stable surface.
To replace an I/O module
-
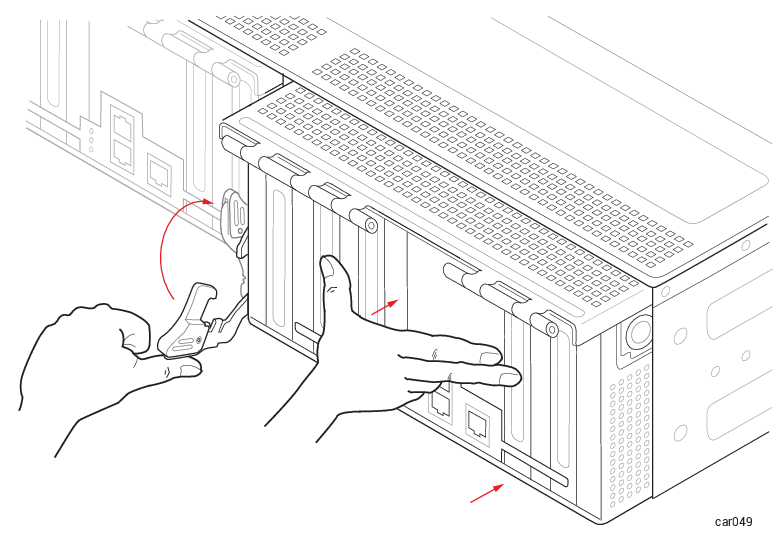
Extend the release lever on the I/O module until it is fully open.
-
Slide the I/O module into the system chassis until it stops. Ensure that the module is fully seated and aligns with the system chassis.
-
Push on the center of the I/O module with one hand while simultaneously using your other hand to push up the release lever until it clicks. See Figure 41.
Figure 41: Replacing I/O Module
-
Push on the center of the I/O module once more to make sure it is fully seated in the system chassis.
-
Connect all of the cables.