Replacing, Adding, and Upgrading Memory
Replacing, adding, and upgrading ztC Endurance system memory involves removing and installing the DIMMs that are housed on ztC Endurance compute modules. Before working with DIMMs, read Memory in ztC Endurance Systems.
This section describes:
Terminology for Memory Procedures
Before adding memory to the ztC Endurance system or replacing existing DIMMs, review the following terms to understand how they are used in this guide:
-
Adding — Increasing the quantity of DIMMs on the ztC Endurance system by inserting additional DIMMs in empty slots on the compute module.
When you add memory, you must add DIMMs to both compute modules. See Memory in ztC Endurance Systems for DIMM locations for your configuration.
-
Upgrading— Increasing the total memory capacity of the ztC Endurance system by replacing an existing DIMM with a higher capacity DIMM (currently, the ztC Endurance system supports only 64GB DIMMs, but higher-capacity DIMMs may be supported in the future).
-
Replacing — Removing an installed DIMM from a compute module and inserting a different DIMM in the same slot.
-
Removing — Removing an existing DIMM from its slot on the ztC Endurance compute module.
-
Installing — Inserting a DIMM in an empty slot on the ztC Endurance compute module.
Important Cautions and Notes
-
Use ESD precautions when performing these procedures.
-
Read Replacing System Components before you remove any system components.
-
Utilisez les précautions ESD lors de l'exécution de ces procédures.
-
Lisez Replacing System Components avant de retirer des composants du système.
Replacing DIMMs
To replace a DIMM on a ztC Endurance compute module, follow the instructions below and in the following section, Adding DIMMs.
To replace a DIMM
-
Remove the compute module that houses the DIMM you want to replace.
-
Place the compute module on a firm surface.
-
Using the information in Memory in ztC Endurance Systems, determine:
-
The slots in which DIMMs are currently installed
-
The correct slot in which to insert the new DIMM
-
-
Facing the front of the compute module:
-
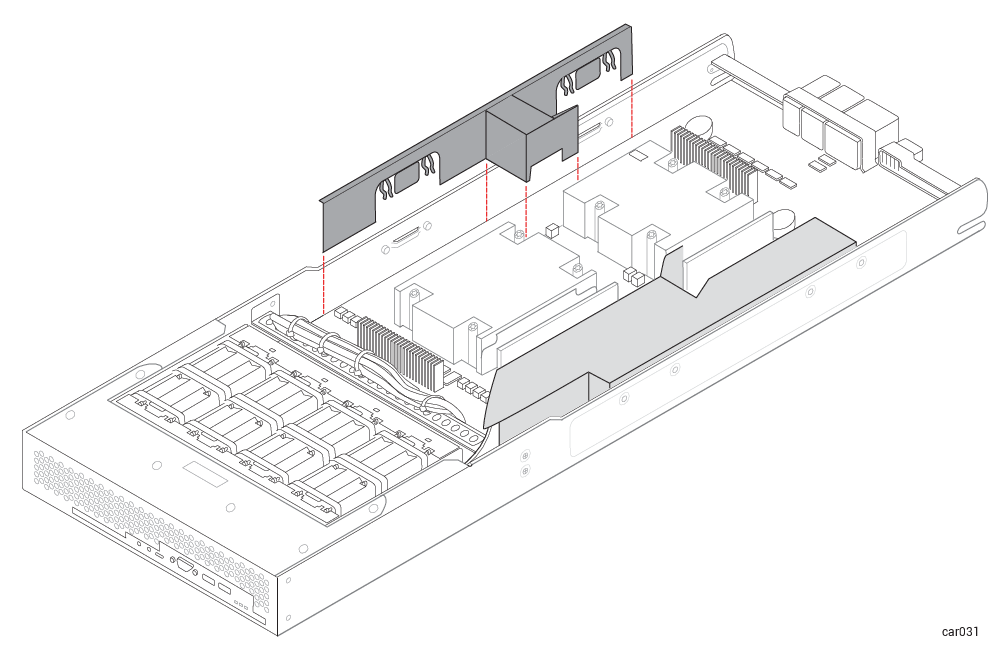
If you are removing and replacing a DIMM on the left side of the compute module, remove the small baffle to the left of the DIMMs by gently pulling up one side of the baffle and then the other side. See Figure 34.
Figure 34: Removing Small Baffle
-
If you are replacing a DIMM on the right side of the compute module, you do not need to remove the large baffle. Proceed to the next step.
-
-
Push down on the ejector levers at each end of the DIMM to be removed. See Figure 35.
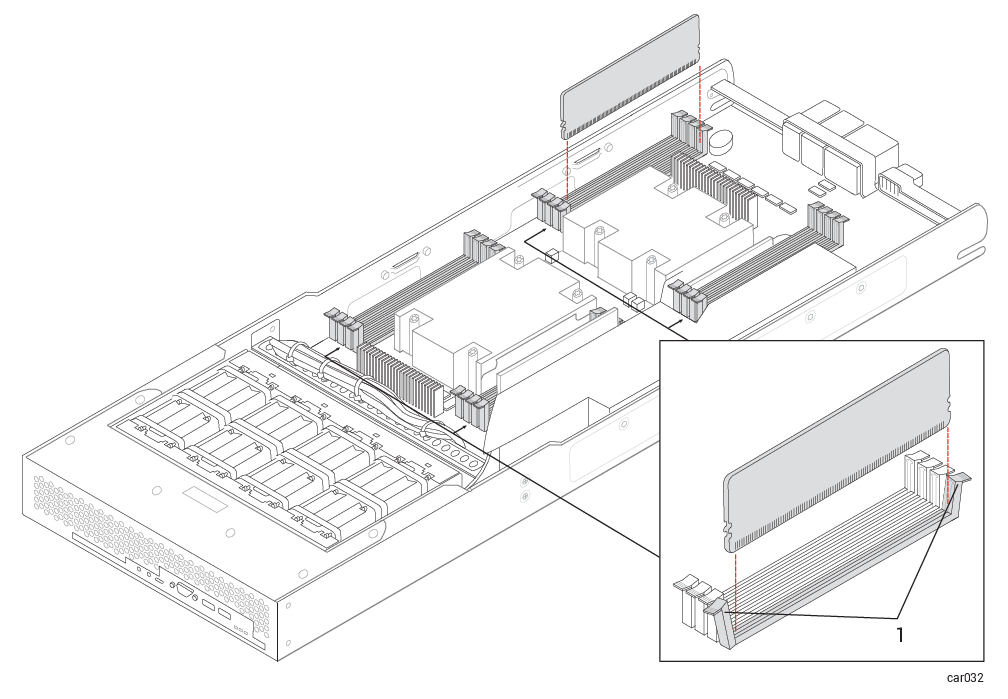
1 Ejector levers
-
Pull the DIMM straight up to remove it from the connector.
To install the new DIMM, proceed to the next section, Adding DIMMs.
Adding DIMMs
You add a DIMM to a ztC Endurance compute module to increase the amount of system memory, or to replace an existing, faulty DIMM.
When you add memory, you must add DIMMs to both compute modules. See Memory in ztC Endurance Systems for DIMM locations for your configuration.
To insert a DIMM into a compute module
If you are inserting a DIMM in the same slot from which you just removed one, as described in Replacing DIMMs, proceed to Step 6 in the following procedure.
-
Perform a total shutdown of the ztC Endurance server using the Shutdown button on the ztC Endurance console Dashboard page.
-
Remove the compute module that houses the DIMM you want to replace.
-
Place the compute module on a firm surface.
-
Using the information in Memory in ztC Endurance Systems, determine the correct slot in which to insert the new DIMM.
-
Facing the front of the compute module:
-
If you are adding a DIMM to the left side of the compute module, remove the small baffle to the left of the DIMMs by gently pulling up one side of the baffle and then the other side. See Figure 34 in Replacing DIMMs.
-
If you are replacing a DIMM on the right side of the compute module, you do not need to remove the large baffle. Proceed to the next step.
-
-
Push down on the ejector levers at each end of the slot in which the DIMM will be inserted. See Figure 35 in Replacing DIMMs.
-
With the DIMM connector ejector levers in the open position (down), align the small slots on the base of the DIMM with the notches at the base of the connector. The DIMMs product label must face the direction indicated by the arrows in Figure 36.
Figure 36: Direction of DIMM Product Labels
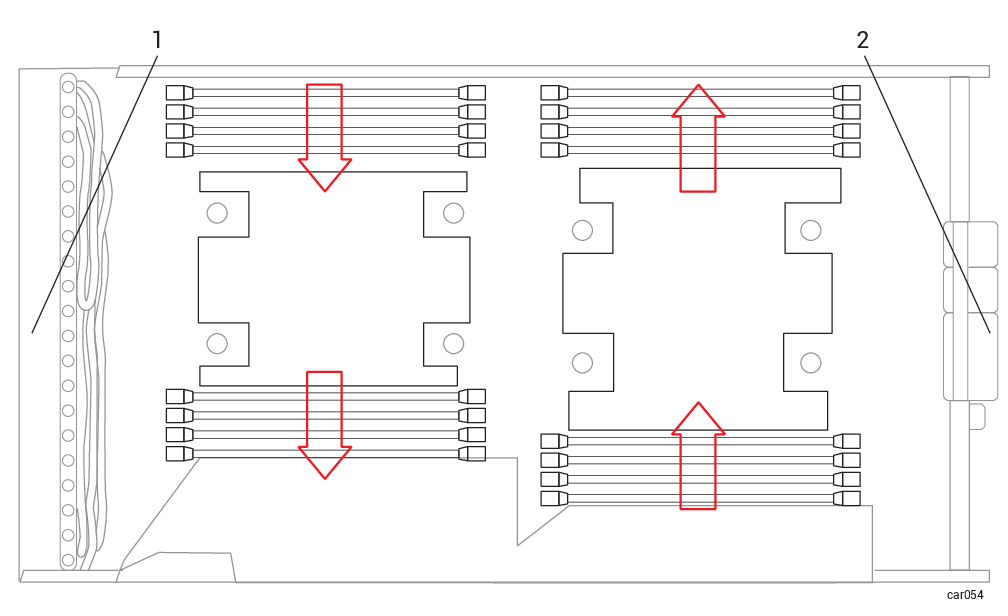
1 Front of compute module 2 Rear of compute module -
Push the DIMM down firmly into place. Make sure it is fully seated.
-
Ensure that the connector's ejector levers are raised and fully locked into place. If they are not, eject and reseat the DIMM.
-
Optionally, repeat Steps 6 through 9 for any additional DIMMs.
-
If you removed the small baffle earlier, replace it by aligning the curved clips with the metal mounting pins on the side wall of the chassis. Push down firmly.
-
After installing the DIMMs, replace the compute module.
-
Repeat this procedure from step 1 to add the required corresponding DIMM to the other compute module.
-
Power on the ztC Endurance system.
-
Watch the BIOS display for each compute module as it runs its Power-On Self-Test (POST) routine to ensure that the memory matches the expected configuration. Alternatively, when the system has booted to the operating system, you can use the ztC Endurance console to verify the memory configuration.