Replacing and Adding RDIMMs
You install RDIMMs when upgrading system memory or replacing a faulty RDIMM. Before you install RDIMMs, read Memory in ztC Endurance Systems.
To remove RDIMMs
-
Remove the compute module whose RDIMMs you are upgrading.
-
Push down on the ejector levers at each end of the RDIMM to be removed. See Figure 31.
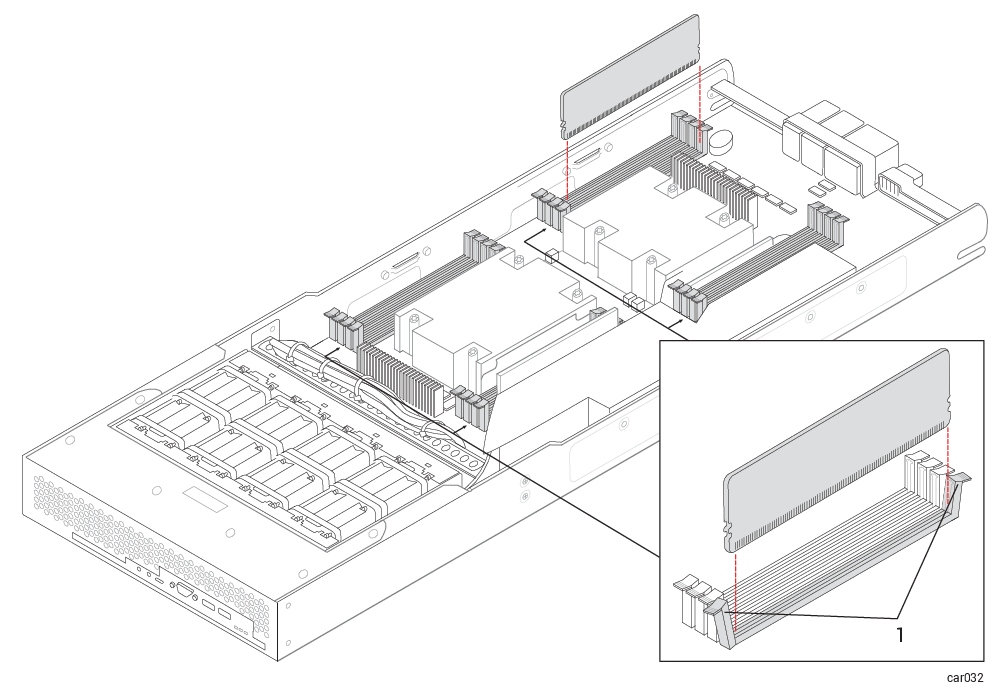
1 Ejector levers
-
Pull the RDIMM straight up to remove it from the connector.
To install RDIMMs
-
With the RDIMM connector ejector levers in the open position (down), align the small slots on the base of the RDIMM with the notches at the base of the connector. Push the RDIMM down firmly into place. Make sure it is fully seated.
-
Ensure that the connector's ejector levers are raised and fully locked into place. If they are not, eject and reseat the RDIMM.
-
Repeat Steps 1 and 2 for any additional RDIMMs.
-
After installing the RDIMMs, replace the compute module.